Picture
Freelance
A freelancer, or contract service provider, is someone who works on a contract or freelance basis. As a freelancer you are acting as a specialist, or expert, in your field. This is not to say you need dozens of awards hanging on your wall, you just need to be proficient and knowledgeable in the duties you perform.

Freelancers are in high demand by employers for many reasons -when a project deadline must be met, when the company lacks adequate expertise or experiences sudden and explosive growth, and so on.

Many times an employer simply cannot justify the additional expense associated with hiring another employee. Since you are not an employee of the company, you keep 100% of the money you earn and are responsible for your own taxes. On the whole, you don't have to be licensed, insured, or have a business of your own. You just have to be a person that can do the project.


 
Picture

Basically Google AdSense is a Google program where pay per clicks are hosted on your website and when someone clicks the ad, you would earn money. Hence it’s a great revenue making opportunity for small, medium websites. Running a website so as to only earn money by Google AdSense is against the policies of Google AdSense, hence one has to include affiliate links or must sell one’s own products too. The money you earn by Google AdSense depends on the traffic towards your website and also how relevant and attractive the advertisements are.


Picture
Google AdSense is a simple and absolutely free method for website owners, bloggers and ad publishers to earn money by placing and integrating Google ads into their websites or blogs. Google has these facilities whereby you can earn revenue that is generated from your website when people search from your site, resulting in Google ads being displayed in the search results, which can help monetize the website.


Picture

Any business might occasionally take on contracts that it later regrets having accepted. Other companies may offer too-good-to-be-true terms in the hopes of obtaining free labor. Avoiding these risky "opportunities" is a challenge, especially for the freelancer. The following warning signs should make you think twice about pursuing a particular freelance assignment.


THE CLIENT

Withholds Contact Information

A client's reluctance to provide an address and phone number tends to frustrate an effective working relationship. It may also cast a shadow on a client's motives and make it impossible to find the client who hasn't paid their bill.


Picture
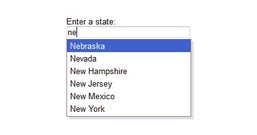
If you access sites that require your username and password you can set Internet Explorer to auto fill in the information for you after you’ve entered the first few characters of each field.

  • In Internet Explorer, Click on Tools, then “Internet Options”.
  • Click the Content Tab.
  • In the “Personal Information” area, click “Auto Complete”.
  • Check the “User names and passwords on forms” Box.
  • Click OK to Finish Up.

 
Picture
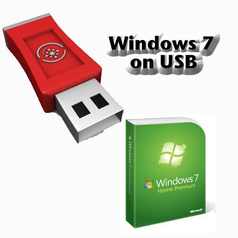
Step 1: Create Bootable USB Drive:

  • Start PowerISO (v5.2 or newer version, download here).
  • Insert the USB drive you intend to boot from.
  • Choose the menu “Tools > Create Bootable USB Drive”. The “Create Bootable USB Drive” Dialogs will popup. If you are using Windows Vista or Windows 7 operating system, you need confirm the UAC dialog to continue.
  • In “Crate Bootable USB Drive” Dialog, Click “...” button to open the .iso file of Windows 7.
  • Select the correct USB drive from the “Destination USB Drive” list if multiple USB drivers are connected to the computer.
  • Choose the proper writing method. “USB-HDD” is recommended.
  • Click “Start” button to start creating Windows 7 Bootable USB Drive.
If no errors occurred in the above process, you should now be set to setup windows 7 from USB drive!

Step 2: Configuring the BIOS:

You should now reboot and go into the BIOS configuration to boot from USB. Instructions for doing so wildly from system to system, but generally entail the following:

  • Reboot the system.
  • While booting (before Windows starts loading), get into the BIOS configuration screen by hitting something like F1, F2, F6, F10, Delete or Escape. Hotkey instructions are generally provided on the screen.
  • Go to the section that contains your boot deices.
  • With your USB drive plugged in, the USB drive should be listed. If it isn’t, your system might not support booting from USB. Assuming that it is supported (as is the case with virtually all modern hardware), promote your USB drive to the primary boot device.
  • Exit from the BIOS configuration, saving all changes.

Step 3: Booting and setup windows 7 form USB drive:

Assuming that you properly configured your BIOS and your USB drive supports booting; Windows 7 setup should now load. Depending on the speed of your USB drive, this may take a while.

If it isn’t working, then double-check the following before making a scene:

  • Is your BIOS properly configured for booting from the USB device? (Is the USB device listed and does is have top priority?)
  • Have you correctly prepared the USB drive in step one? (Restart the procedure.)
  • Does your USB drive properly support being booted from? (Try another one!)

 
Picture
Bookmark any web page form field and quickly access it from the browser address bar. Below is an example of how you could bookmark the Computer Home search and quickly search for help anytime.

  • Right-click on the search box in the top left portion of this window.
  • Click “Add a keyword for this search”.
  • In the Add bookmark window, type any name or leave it blank and for the keyword make it something simple and easy to remember. For example: “CH” for “Computer Hope” and click Ok.
Now in your address bar you can type: “CH” and then anything you need help with. For Example: “CH motherboard” would open the search results for motherboard.


Picture
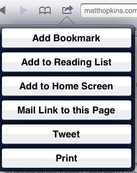
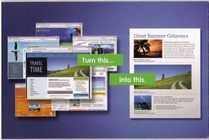
Printing web pages can be tricky because often the lines of text are clipped off, leaving you to guess at what was removed.

If this happens, you can fix it by printing them in landscape orientation. This turns a standard 8x 11 page on its side so that the long side is on the bottom. When you print a web page in this orientation the lines of text usually do not get clipped.

  • Open Internet Explorer. Click File on the Menu Bar and then select ‘Page Setup’.
  • In the lower left hand corner of the page that opens you’ll see the Orientation area.
  • Select Landscape, Click Ok and then print the page as you normally would.

 
Picture
  • Open Internet Explorer and Click Tools on the menu bar.
  • Select “Internet Options” form the menu that appears and the “Internet Options” window opens as shown here.
  • There are a number of tabs at the top. Select the General Tab, if not already selected.
  • Near the top of the General page, you will see the Homepage area.
  • Click the “Use Current”, button and delete the address that appears in the Address box.
  • Type in or paste in the complete web address (URL) of the page you want as your new home page.
  • Click Ok and you’re done!

 
Picture
Have you ever opened a web page in Internet Explorer only to find red ex.’s in place of the picture?

This can happen when the settings in your Internet Explorer are changed for whatever reason. The correct settings for showing pictures in Internet Explorer are:

  • Click Tools, ‘Internet Options” and then the Advanced tab.
  • Scroll down to the Multimedia section of the list that is displayed and check the box next to ‘Show Pictures’.
  • Click Ok to complete.